Ads 468x60px

Pages

Selasa, 07 Januari 2014

How to Root Galaxy Note 8 0 N5100 on Android 4 2 2 XXCMH1 Jelly Bean Firmware

A new Android 4.2.2 Jelly Bean update with firmware build number N5100XXCMH1 has been released on the international 3G version of Samsung Galaxy Note 8.0 (GT-N5100).

Samsung Galaxy Note 8.0 N5100 users who have already updated their devices with Android 4.2.2 XXCMH1 Jelly Bean, may root their devices using the tutorial below.

This tutorial uses CF-Auto-Root file released by recognised XDA Developers, Chainfire. The CF-Auto-Root file allowing Galaxy Note 8.0 users to root their devices easily without depending on the firmware. It completely supports Android 4.2.2 Jelly Bean and future firmware as well. Head over to the CF-Auto-Root main thread to learn more about the root method.

Disclaimer: Rooting voids the warranty of your device. We and the developer of this rooting procedures shall not be held responsible if any undesirable outcomes may happen to your device. use of this root guide is solely at your own risk!

Pre-requisites
1. Install USB Drivers for Samsung Galaxy Note 8.0 on the computer.
2. Enable USB Debugging Mode on the phone by navigating to Settings >> Developer Options.
3. Make a backup of all your important data before following the guide.
4. The Galaxy Note 8.0 should be factory unlocked and not locked to any particular carrier.
5. Ensure the battery of the phone is charged more than 80 per cent.
6. The CF-Auto-Root file works only on Samsung Galaxy Note 8.0 N5100. Applying this to any incorrect variant might brick the device. Verify the model number of the Galaxy Note 8.0 by navigating to Settings >> About Phone.

File Required
1. CF-Auto-Root for Galaxy Note 8.0 N5100 (CF-Auto-Root-kona3g-kona3gxx-gtn5100.zip)
2. Odin 3.07

Steps to Root Galaxy Note 8.0 N5100 Running on Android 4.2.2 Jelly Bean Firmware
Step 1: Extract CF-Auto-Root and Odin 3.07 files using winrar/7zip/winzip or any other extracting tool.
Step 2: Switch off the Galaxy Note 8.0. Then boot the device into Download Mode by pressing and holding Volume Down, Home and Power buttons together until a construction Android robot icon with a warning triangle appears on screen. Now press the Volume Up button to enter Download Mode.
Step 3: Launch Odin on the computer as an Administrator.
Step 4: Connect the Galaxy Note 8.0 to the computer using USB cable while it is in the Download Mode. Wait until Odin detects the device. When the device is connected successfully, the ID: COM box will turn blue with the COM port number. Additionally, the successful connected will be indicated by a message saying Added.

Note: If the Added message does not appear, then try re-install USB drivers or changing the port on the computer.

Step 5: In Odin, click the PDA button and select the CF-Auto-Root-kona3g-kona3gxx-gtn5100.tar.md5 file.
Step 6: Verify that Auto Reboot and F.Reset Time checkboxes are selected in Odin. Also, ensure the Re-Partition option is not selected.
Step 7: Double-check and click Start button in Odin. The installation process will now begin.
Step 8: Once the installation process is completed, your phone will restart and soon you will see a PASS message with green background in the left-most box at the very top of the Odin. You can now unplug the USB cable to disconnect your device from computer.

Samsung Galaxy Note 8.0 N5100 running on Android 4.2.2 Jelly Bean firmware is now rooted successfully. You can now install any app that requires root permission. Verify the root status of the device by downloading Root Checker app from Google Play Store.

Thanks to all fellas at XDA who first tried out this rooting technique. This method was originally posted via XDA-Developers original thread.

Click here to know How to Update Galaxy Note 8.0 N5100 with official Android 4.2.2 XXCMH1 Jelly Bean firmware.
Read More..

Sabtu, 04 Januari 2014

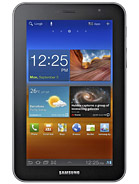
How to Update Galaxy Tab 7 0 Plus P6200 with Android 4 1 2 XXMC3 Jelly Bean Official Firmware

Good news for Samsung Galaxy Tab 7.0 Plus GT-P6200 owners, Samsung has started pushing the official Android 4.1.2 Jelly Bean update with build number P6200XXMC3. This XXMC3 is freshly build on March 25th, a full upgrade to Android 4.1.2 from previous 4.0.4 ICS.

This update brings some new stuff on the Samsung Galaxy Tab 7.0 Plus such as Google Now, Smart Stay, Blocking Mode that let users block any unwanted calls, new Gallery, a redesigned Home Screen launcher, Text-to-speech capability and a new notifications settings.

Firmware details
PDA: P6200XXMC3
CSC: P6200OXAMC3
Version: Android 4.1.2
Built date: March, 2013
Regions: Austria, Belgium, France, Germany, Hungary, Italy, Spain, United Kingdom

The Galaxy Tab 7.0 Plus users who fail to upgrade their devices with Android 4.1.2 XXMC3 Jelly Bean using official method for being region specific, may follow our step-by-step guide to install the update manually.

Pre-requisite
1) Install USB Driver for Samsung Galaxy Tab 7.0 Plus on your computer.
2) Enable USB Debugging Mode. [Press Menu >> Settings >> Applications. From there navigate and tap on Development option and ensure the USB Debugging is turned on.]
3) Make a backup of all your important data before following the guide.
4) Ensure the battery of the tablet is charged more than 80 per cent.
5) Your tablet should be factory unlocked.

Steps to Update Android 4.1.2 XXMC3 Jelly Bean on Galaxy Tab 7.0 Plus P6200
Step 1: Download Android 4.1.2 XXMC3 Jelly Bean for Galaxy Tab 7.0 Plus P6200 to your computer. You should get a .tar file along with some other files while extracting the firmware zip file
Step 2: Download Odin 3.07 and extract the zip file
Step 3: Power off the Galaxy tablet and enter into Download Mode by pressing and holding the Volume Down and Power buttons together. Then press the Volume up button to continue enter into Download Mode
Step 4: Run Odin on the computer
Step 5: Plug in the USB cable to the Galaxy tablet to connect it with the computer. A message saying Added will arrive under Odins message box. You should also see COM port with a number in Yellow if the device is successfully connected
[Note: In case you do not see the Added message, then try another USB port. If that does not work too then reinstall USB driver.]
Step 6: Select the files, in the order mentioned below, which you have extracted from P6200XXMC3 folder
  • Click the PDA button and select the .tar.md5 file with Code in its name
  • Click the Phone button and select file with Modem in its name
  • Click the CSC button and select file with CSC in its name
  • Click the PIT button and select the .pit file
[Note: You may ignore the last three steps in case such files are not found.] 
Step 7: In Odin window, ensure Auto Reboot and F.Reset Time checkboxes are selected. In case you are using a .pit file, then make sure Re-Partition checkbox is also elected
Step 8: Click the Start button in Odin to begin the installation
Step 9: After the installation process is completed, you should see a Pass message with green background in the extreme left box at the top of Odin. The tablet will then automatically reboot and soon you should see the Samsung logo. You may safely unplug the USB cable from the tablet to disconnect it from the computer
[Note: If the Galaxy Tab gets stuck at booting animation (after step-9) then head over to recovery mode and perform data wiping task by selecting Wipe Data/factory Reset and then select Reboot System now.]

Android 4.1.2 XXMC3 official Jelly Bean firmware is now installed and running on your Samsung Galaxy Tab 7.0 Plus P6200. Head over to Settings >> About Tablet to verify the software version on your device.

Click here to know How to Root Galaxy Tab 7.0 Plus P6200 running on Android 4.1.2 XXMC3 Jelly Bean firmware.
Read More..

Windows 8 Launcher Premium free download v1 4 2 APK


Today i share a very inserting apps . This is a  Windows 8 Launcher Premium . Windows 8 Launcher is the best android launcher . Windows 8 operating system use only Nokia Lumia . But we are all android user using free . you can enjoy Nokia Lumia phone in android phone . i think Windows 8 Launcher is the best launcher in android world . 


Screenshot :


Features : 

1. Looks like real windows 8 .

2. You can add different size tiles

3. You can add a variety of color tile

4. You can save and restore the theme

5. You can edit the start screen layout

6. You can set the current background style
 
7. You can switch the application list style

8. You can add Android widgets in the tiles

9. You can set the wp8 style lock screen and status bar

10. You can select more than one hundred kinds of theme colors


 ---------------------------

  Download

Windows 8 launcher

-----------------------------

Read More..

Jumat, 03 Januari 2014

How to Root Nexus 7 2012 Mobile on Android 4 4 KRT16S KitKat and Install CWM TWRP Recovery

The official Android 4.4 Kitkat Over-The-Air (OTA) update with build version KRT16S is now available for download for the 3G version of the Nexus 7 (2012).

Nexus 7 (2012) 3G users who have already installed their devices with Android 4.4 KRT16S KitKat, may root their devices using the tutorial below.

Disclaimer: Rooting voids the warranty of your device. We and the developer of this rooting procedures shall not be held responsible if any undesirable outcomes may happen to your device. use of this root guide is solely at your own risk!

Pre-requisites
1. Make a backup of all your important data before following the guide.
2. Enable USB Debugging Mode on the tablet.
3. The Nexus 7 bootloader should be unlocked.
4. Ensure the battery of the tablet is charged more than 80 percent.
5. The CWM/TWRP Recovery and SuperSU files compatible only with the 3G version of Nexus 7 (2012) running on Android 4.4 KRT16S KitKat. Applying these on any incorrect variant will brick the device. Verify the model number of the Nexus 7 by navigating to Settings >> About Phone.

File Required
1. Android SDK
2. Fastboot
3. CWM or TWRP Recovery
4. SuperSU (UPDATE-SuperSU-v1.75.zip) or the latest version

Steps to Root Nexus 7 (2012) Mobile Running on Android 4.4 KitKat and Install CWM/TWRP Recovery
Step 1: Install the Android SDK. The package includes the necessary drivers for connecting your tablet to the computer, which is mandatory for the rooting process.
Step 2: Extract the Fastboot .zip file using winrar/7zip/winzip or any other extracting tool and copy it to the android-sdk-windowsplatform-tools directory on the computer.
Step 4: Copy the CWM or TWRP .img file to the android-sdk-windowsplatform-tools directory on the computer.
Step 5: Connect the Nexus 7 to the computer using USB cable. Then copy the SuperSU .zip file to the SD card of your tablet.
Step 6: Switch off the Nexus 7. Then boot the device into fastboot mode by pressing and holding Volume Up, Volume Down, and Power buttons together.
Step 7: Navigate to android-sdk-windowsplatform-tools directory and open Command Prompt (Shift + Right-click >> Open Command Prompt). Then run the following command:

fastboot flash recovery recovery-clockwork-touch-6.0.4.3-tilapia.img

Step 8: Once completed, choose RECOVERY from the Fastboot menu and enter Recovery Mode.
Step 9: In CWM Recovery, select "install zip from sdcard" and then select "choose zip from sdcard". Now, navigate to the SuperSU .zip file that you copied earlier and confirm the installation by selecting Yes.
Step 10: Once the installation process completes, return to main recovery menu and select "reboot system now".

Nexus 7 (2012) 3G running on Android 4.4 KRT16S KitKat is now rooted successfully. Open the app drawer of the Nexus 7 and look for an app called SuperSU. Verify the root status of the device by downloading Root Checker app from Google Play Store.
Read More..

Rabu, 18 September 2013

Powering a new job search engine for military veterans

(Cross-posted on the Inside Search blog and the Public Policy blog)

Earlier today, President Obama spoke about the importance of helping returning military veterans find work. Thousands of businesses have committed to hiring military veterans and families and as part of this nationwide effort, starting today, job seekers can visit the National Resource Directory (NRD) to search more than 500,000 job openings from employers around the country.


We have been working with the U.S. Department of Veterans Affairs to provide a customized job search engine for the NRD, using Google Custom Search technology. This custom search engine uses the power and scale of Google search to constantly crawl the web, looking for JobPosting markup from Schema.org on sites like simplyhired.com to identify veteran-committed job openings. An employer can easily add a job posting to NRD simply by adding that markup to their own web page. As pages are updated or removed from the web, they’re automatically updated and removed from the system, keeping the available job postings on NRD fresh and up to date.

If you’re an employer, you can find more information on how to participate on nationalresourcedirectory.gov. In addition, organizations such as local veterans groups can help people find jobs by adding a veteran-committed jobs search box to their websites.

We’re happy to contribute to this important initiative and hope businesses use this opportunity to connect with veterans seeking employment.

Read More..

Selasa, 17 September 2013

ZombieBooth Full APK


Requirements: Android 1.6 and up

How would you look as a zombie?! What about your friends?
ZombieBooth is a fun way to instantly make your face into a 3D, animated zombie!

CUSTOMIZABLE 3D ZOMBIES!

Read more »
Read More..

Senin, 16 September 2013

Renaissanse Blood THD v1 0 Apk

Renaissanse Blood THD
Renaissanse Blood THD v1.0 Apk

Requirements: Tegra 3, Android 2.2 and up
Overview: Da Vinci is dead. Find the final blueprint that he left behind...at all costs.

Now it’s up to you and the heroes of the Renaissance to find the final blue print that he left behind.

Renaissance Blood THD is a first-person shooter that takes place in the Renaissance era. Developed specifically for the NVIDIA® Tegra 3® chip and the Unreal Engine, this visually stunning action-packed thriller dares to raise the bar for shooting games on all platforms.

Immerse yourself in a world where science and alchemy set the rules, and battle your way through a slew of mobs with spectacular weapons inspired by Da Vinci’s inventions.

Key Features:
– Designed specifically to take full advantage of devices using NVIDIA Tegra 3 quad-core mobile processor with its 4-PLUS-1 quad-core CPU architecture that delivers outstanding performance and amazing battery life, plus a 12-core GPU, to deliver up to 5x the performance of the worlds first dual-core processor, Tegra 2.
– Intuitive controls for players of all levels
– Dynamic character lighting and gamma correction for realistic light calculations
– Interactive scene objects using advanced physics simulations

APK:
http://turbobit.net/lnxga99tjonk.html
http://extabit.com/file/27b3h9m8npah4
https://www.rapidshare.com/files/157..._crd_tag3r.apk
http://jumbofiles.com/sx0dfnmjq0ik/R...tag3r.apk.html
http://www4.zippyshare.com/v/66660228/file.html

SD Data:
http://extabit.com/file/27b3h9m8pkz6w
https://www.rapidshare.com/files/403...od_Trekest.rar
Read More..